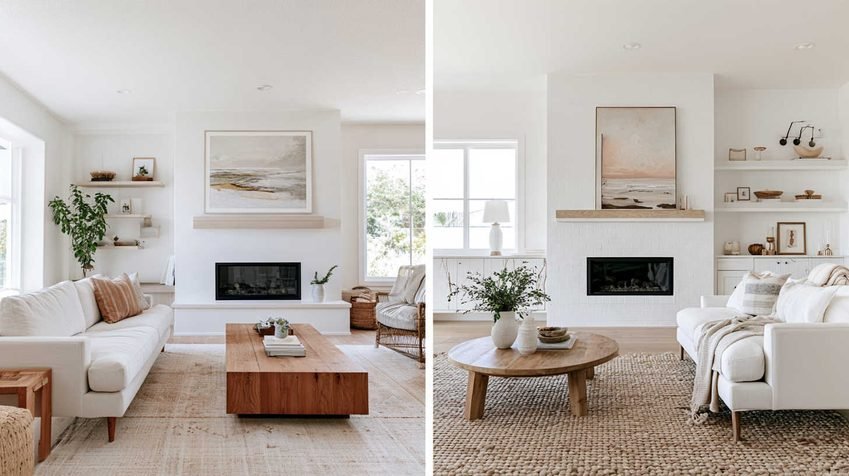
If you’ve ever walked into a home you saw online and thought “this is so much smaller than the pictures,” you’re not imagining things. Rooms genuinely do look bigger in photos than they do in person, and the reasons have nothing to do with dishonesty. They come down to optics, camera settings, staging, and basic human perception — factors that apply to real estate listings, Airbnb photos, restaurant interiors, and even your own living room selfies.
This guide breaks down exactly why this happens, the camera techniques photographers use, and how you can apply (or account for) these tricks yourself.
The Short Answer
Rooms look bigger in photos mainly because of wide-angle lenses, which bend light to fit more of a space into one frame and stretch the perceived distance between walls. Add in camera height, bright even lighting, decluttered staging, and a flattened 2D perspective, and a modest room can look like a grand open space on screen.
Why Cameras See Space Differently Than Your Eyes
1. Wide-Angle Lenses Stretch Perspective
Most real estate and interior photographers use wide-angle lenses, typically in the 10mm–24mm range on full-frame cameras. These lenses capture a much wider field of view than the human eye, allowing an entire room — floor, walls, and ceiling — to fit into a single frame.
The tradeoff is geometric distortion. Wide lenses exaggerate the distance between the foreground and background, making near objects look larger and far walls look further away. This is the single biggest reason a photographed room looks more spacious than it feels standing inside it.
For comparison, the human eye has a natural field of view roughly equivalent to a 50mm lens on a full-frame camera — much narrower than what’s used in listing photos.
| Lens Focal Length | Field of View | Typical Use | Approximate Price Range (USD) |
|---|---|---|---|
| 10–14mm (ultra-wide) | Very wide, strong distortion | Small rooms, tight spaces | $500 – $1,500 |
| 16–24mm (wide-angle) | Wide, moderate distortion | Standard real estate photography | $600 – $2,000 |
| 35mm | Slightly wide | Detail shots, hallways | $400 – $1,800 |
| 50mm (standard) | Matches human eye | Portraits, close detail | $150 – $600 |
Note: prices vary by brand (Canon, Nikon, Sony, Sigma, Tamron) and lens quality tier.
2. Camera Height Changes the Whole Room
Photographers rarely shoot from standing eye level. Most position the camera between 4 and 5 feet off the ground, roughly waist to chest height, and angle it slightly toward the corner of the room. This height balances how much floor and ceiling appear in frame, which opens up the sense of vertical space.
Shoot too high, and the room feels compressed and top-heavy. Shoot too low, and furniture looks oversized and the ceiling appears unnaturally tall. Chest-height, corner-facing shots are the industry standard because they mimic a flattering, natural vantage point while still maximizing visible space.
3. Photos Are Flat — Real Life Isn’t
A camera converts a three-dimensional space into a two-dimensional image. This flattening removes several depth cues your brain normally relies on:
- Binocular vision (using two eyes to judge distance)
- Parallax from head and body movement
- Peripheral vision that senses tight walls and narrow walkways
- Physical “circulation” — the felt experience of walking through a space
In person, your brain constantly recalculates the room’s real size as you move. A photo freezes one static viewpoint, stripping away the cues that would otherwise reveal a cramped corner or narrow hallway.
4. Lighting Removes Shadows and Visual Weight
Professional interior photography uses bright, even, well-balanced lighting — often blending natural daylight with supplemental lights or HDR (High Dynamic Range) blending. This technique combines multiple exposures to preserve detail in both bright windows and dark corners simultaneously, something the human eye does automatically but a single camera exposure cannot.
The result: shadows that would normally make a room feel smaller and more enclosed are minimized or eliminated, creating an airy, open impression that doesn’t fully match reality.
5. Staging and Decluttering
Listing photos are staged deliberately:
- Furniture is minimized or scaled down slightly
- Personal items, cords, and clutter are removed
- Surfaces are cleared
- Rooms are cleaned and rearranged to maximize open floor space
A cluttered, lived-in room visually “shrinks” because the eye has more objects to process and less open space to register. Strip that away, and the same square footage reads as significantly larger.
Why Your Brain Perceives Photos Differently
Your eyes and brain don’t work like a camera sensor. A few key differences:
- Dynamic range: Human eyes adapt instantly to a huge range of light levels; a camera must lock in a single exposure for the whole image, which can wash out bright areas or crush shadow detail.
- White balance: Your brain automatically corrects colors under different lighting (a white wall still looks white under yellow bulbs), while a camera records the literal color cast unless white balance is manually corrected.
- Depth perception: Two eyes working together, plus constant micro-movements, give you real-time 3D spatial awareness that a flat photo simply cannot replicate.
This is why a listing photo can look bright, spacious, and color-accurate on screen, while the same room in person feels dimmer, tighter, or slightly different in tone.
Best Camera Angles for Making Rooms Look Bigger
Photographers rely on a specific set of angles and compositional choices. Here’s what’s most effective, room by room.
Shoot From the Corner
Capturing two walls instead of one instantly adds depth. This is the most widely used technique across almost every room type because it shows more floor space, better context, and stronger visual balance.
Keep the Camera Level and at Chest Height
Tilting the camera up or down distorts vertical lines, making walls appear to lean inward — a subtle but noticeable effect that makes spaces feel smaller and less natural. Keeping the camera level (4–5 feet high) avoids this entirely.
Use Doorways to Frame the Shot
Doorways create a natural frame and add a strong sense of depth, especially useful in small rooms like bathrooms or laundry rooms where a corner shot might not be possible.
Capture Room Flow
Photographing the transition between connected spaces — kitchen into dining room, living room into patio — helps viewers understand the layout and reinforces a sense of openness.
Use Straight-On Shots for Symmetrical Spaces
Kitchens, dining rooms, and feature walls often benefit from centered, symmetrical compositions rather than angled corner shots.
Camera Angles and Habits to Avoid
- Shooting from the center of the room — flattens the image and removes depth
- Tilting the camera up or down — distorts vertical lines and makes walls lean
- Standing too close to furniture — makes the room feel crowded and cuts off context
- Relying on extreme ultra-wide lenses — creates unrealistic, obviously distorted results that can misrepresent the space
How Editing Finishes the Effect
Once the photo is captured, editing plays a major role in the final impression:
- Lens correction: Flattens the curved distortion from wide-angle lenses so straight lines look straight, not bowed.
- Exposure and contrast blending (HDR): Merges multiple shots to balance bright windows with darker interior areas.
- White balance correction: Removes yellow or blue color casts from mixed lighting sources.
- Color and saturation boosts: Makes wall colors, wood tones, and greenery look slightly more vivid than in person.
- Sky replacement or window pull: Common in real estate editing to show a bright blue sky through windows instead of an overexposed white blur.
None of these are inherently deceptive — they’re standard techniques to represent a space accurately under imperfect lighting conditions. Problems arise only when editing is used to exaggerate size or hide real defects like damage, water stains, or structural issues.
How to Make a Room Look Good in Person Too
If you’re staging your own space — whether for photos, a showing, or just everyday living — these fixes close the gap between how a room photographs and how it actually feels:
- Add layered lighting. Combine ceiling lights, lamps, and natural daylight to eliminate harsh shadows in corners.
- Declutter surfaces. Store away small items; a clear counter or shelf reads as more spacious immediately.
- Use mirrors strategically. Mirrors bounce light and visually double a room’s depth.
- Choose furniture that fits the scale of the room. Oversized pieces make any space feel tighter.
- Keep a consistent, lighter color palette. Mid-tone or light walls reflect more light than dark, saturated colors.
- Test with your own phone camera. Take a few shots from different corners — this often reveals clutter or awkward angles you don’t notice standing in the room.
Frequently Asked Questions
A corner angle, shooting two walls at once, is the most effective because it maximizes visible depth and floor space in a single frame.
Most professionals shoot from 4 to 5 feet off the ground — roughly waist to chest height — for the most natural, balanced perspective.
Yes, but stay in the moderate range (14mm–24mm on full-frame). Extremely wide lenses create noticeable, unnatural-looking distortion.
Because photos remove depth cues, flatten the space into 2D, use wide lenses that exaggerate distance, and are typically staged and lit for maximum openness — none of which apply when you’re standing inside the room.
Not inherently. Wide-angle lenses are an industry-standard tool for showing an entire room’s layout in one image. Distortion becomes a problem only when photographers use extreme lenses or heavy editing specifically to exaggerate size beyond what the space can reasonably deliver.
Final Thoughts
The gap between how a room looks in photos and how it feels in person isn’t a trick — it’s the predictable result of lens geometry, camera height, lighting, staging, and the simple fact that a photo is flat while a room is not. Understanding these factors helps buyers, renters, and travelers set realistic expectations before visiting a property, and gives homeowners and photographers the tools to represent a space both accurately and attractively.
Whether you’re evaluating a listing or preparing to shoot one yourself, the fundamentals stay the same: shoot from the corner, keep the camera level at chest height, use balanced lighting, declutter before the shoot, and always see the space in person before making a final decision.
Happy Designing!
Share Why Do Rooms Look Bigger in Photos Than Real Life? with your friends and leave a comment below with your thoughts.
Read Can You Mix Warm and Cool Lighting in One Room? until we meet in the next article.